How to: Reinforce a Crappy WalMart Bookcase OR How to Fix Sagging Shelves
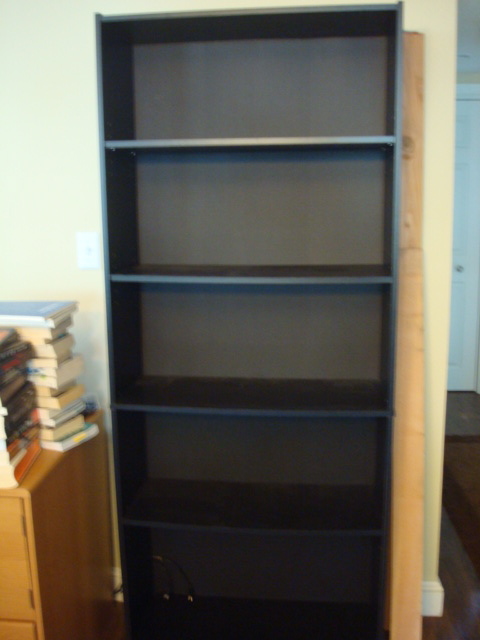
When Orion and I bought a bookcase from Walmart, we bought it because we wanted to store our books on it. The low, low $35 price tag should've tipped us off to its obvious shortcomings, but I'm sure this mistake has been made many a time before. The shelves, made of weak particle board, started bending in the middle immediately, even when we kept the actual books towards the edges of each shelf. Note the sagging:

So if, like us, you would like your bookshelf to actually be able to hold books, go through the following steps.
You will need:
One crappy WalMart bookcase.
Someone willing to use a drill

One ~3" wide board, cut to the height of your bookshelf (floor to top)
4 L-brackets, the color of your bookshelf (these will be visible)
Screws to secure the brackets* (See Very Important Footnote)
Six 1 1/2-inch screws to secure the board
A Drill
The extras all cost us about $20 at Home Depot. Not too shabby.
First, make sure your board is the exact height of your bookcase, floor to top. If it is the wrong height, you might throw your bookcase off balance, which would be bad.
Part I) Securing the board to the back of your bookcase
1. Remove shelves from bookcase
2. Place bookcase face down on floor, so that the back of the case is up
3. Place board on top of the bookcase in the exact center

4. Using a level, align the bottom of the board to the bottom of the two sides of the bookcase
Note: it is VERY IMPORTANT that this be done exactly or your bookcase will be wobbly and may fall over, even if anchored to the wall.

5. Using your 1 1/2" screws, secure the board to your bookcase in three places:
i) First, secure to the bottom shelf

ii) Walmart bookcases come with the second shelf secured to the sides. It is the only shelf that actually holds books and that is available to drill into to support your board. Do so now, using two screws.

iii) Finally, using two more screws, attach your board into the top of the bookcase.

Part II) Reinforcing your shelves
1) Flip your bookcase over so that you're looking at the shelves

2) Put in shelves where you want them to be. Once you screw in the brackets, the shelves will no longer be adjustable, so make sure you have them where you'd like them permanently.
3) Place one L-bracket under each shelf, directly in the middle of the bookcase. This will mean that the L-brackets are on top of the board, which you just attached to the back of the bookcase.

4) Get your drill back out and drill the screws into the bottom part of the L-Bracket, securing them to the back of the bookcase BUT NOT TO THE BOTTOM OF THE SHELF or you will have a nasty screw poking up through the shelf.
5) Stand your bookcase back up, this is what it should look like now:

Now your brackets are poised to hold up the saggy part of each shelf, and are attached to the board on the back of your bookcase.
6) Anchor your bookcase to the wall
Replace your shelves and fill with heavy things, including BOOKS!

Ta-da! Your crappy bookcase is no longer so crappy. We did this over a year ago and have not had any saggy shelves even though we use it for very heavy books.
Good luck!
*Make sure the screws you use for your L-brackets are no longer than the thickness of your supporting board (my board was about 1 inch thick and the screws were 3/4 inches long). If the screws are longer than the board is thick, they will poke out the back of the bookcase and could possibly lead to an interesting new type of flooring.
Thanks for the great idea, now I know what to do with my 3 crappy wal-mart bookshelves!
ReplyDeleteLooked all over youtube for this tutorial but never found it. I was wracking my brain, and thought doing something like this might reinforce my sagging OfficeMax. Thanks sooo much for a user friendly tutorial!
ReplyDeleteThanks for the tip. Also have 3 of these things and this modification is working out great so far.
ReplyDeleteOne other thing people might want to take note of...pay attention to the size of the screws you're going to attach the L-brackets with or you might end up screwing the bookshelf into the floor (almost happened!)
or at the least, you'll have a bunch of nasty screw points sticking out of the back.
DeleteGood tip! Definitely don't want a bookshelf attached to your floor...
DeleteThankyou!! Just what I need to repair my bookshelf!!
DeleteWhat is it with people named "Anonymous" having three of these? :-) I also have three crappy sagging bookcases... filled with books, of all things, and they don't seem to be handling it well; why call them bookcases in the first place, I wonder. I plan to do this as soon as I can borrow someone to use my drill for the day (I hate power tools).
ReplyDeleteAnd yes, check the size of the screws; attaching your bookcase to the wall is not recommended, particularly if (like me) you're renting.
A very comprehensive DIY, indeed! Congratulations for making the bookshelf "not-so-crappy" anymore. Organising books has never been this convenient. Nevertheless, this article is very helpful. Glad you've shared this. Please keep posting your thoughts in the future. Ciao!
ReplyDeleteHi Betsy and Orion,
ReplyDeleteMy friend and I just reinforced my 2 new crappy bookshelves from Walmart by following your directions! Just wanted to say Thank You so much!!!
Ben in Kansas
Hi Ben! Great to hear that this was helpful for you, you're welcome and thanks for the comment :-)
DeleteYes, it worked great! I had screws that were too long for the brackets and nearly did the same thing.
ReplyDeleteThis comment has been removed by the author.
ReplyDeleteI'm going to do this for 19 of these. (I've been putting together a library since 1971, and my money is in the books.) I need to know what size bracket because I'm going to be ordering 95, and I don't want to make a mistake. Can you tell me what size you used?
ReplyDeleteHi Tom, your library sounds like it's going to be amazing and full of heavy books, I picture a rolling ladder like the one in Beauty and the Beast, and I therefore ask that you promise to roll around singing at the top of your lungs when you finally finish your epic book setup!
DeleteI very much regret not writing down the exact specs of the items I used, but I didn't get around to actually writing up this post until a year after we had fixed up the bookcase and by that time I simply couldn't remember. However, we still have this bookcase (and not a single sagging shelf - self-five!) so I got out my tape measure, and here is what I found:
The L Brackets are 7.5 inches on one leg and 5 inches on the other. I put the 7.5 inch side along the bottom of the shelves and secured the 5 inch side to the back-board.
The exact measurements of the brackets are not all that important, just so long as the leg that will support the shelf does not exceed the depth of your bookcase (or it will protrude) and the base-board leg does not exceed the height of the shelf beneath it. I picked my L brackets because they were the only ones that looked about right at Home Depot that day.
A quick note that other commenters have brought up: make sure the screws you use to secure the bottom leg of your bracket to the back-board do not exceed the thickness of the board. The board I used was about an inch thick and the screws that came with the bracket were about 3/4 of an inch long, so it worked out well for me. Just a note of caution so you don't secure your bookcase to the floor, although the shelves probably wouldn't sag that way either. But then again, not so great for rolling ladder conciertos. Best of luck to you!
Betsy,
DeleteThank you. I'll post a link to some photos when I complete the project in a couple or few months.
--Tom
Betsy,
ReplyDeleteI finally completed my library using your technique. Here's a video with some additional tips. http://youtu.be/aDrQJZtFolk (WARNING: I AM EXTREMELY BORING.)
--Tom
Hi Tom,
DeleteWhat a great video! Thank you for posting it! I'm so glad you were able to use the technique for your library, you have an awesome setup. I am definitely going to use your sharpie technique for the extra peg-holes on my bookcase. Great tips, thanks so much for sharing!
Tom,
DeleteI watched your video after reading Betsy & Orion's tutorial. It was helpful to see a whole room set up like a library which is what we need. Will also use shims & sharpies! Boring doesn't matter... you were a great help ;)
Tom I watched your video and was blown away at the work you put into it. I would love to have a room dedicated to all of my books. Also to Betsy and Orion thank you so much for your idea. I inherited some crappy bookcases and some boards from a king size bed that are going to be cut to make extra shelving. I am so happy and I'm excited to bring new life to them for my Ebay office setup. Thank you, Thank you one and all.
DeleteHi
ReplyDeleteThank for your post. I was about the buy the exactly same bookcases that you have, and I am glad I did read your blog. This bookcase is far crappier than I thought, I wouldn't buy.
I have an issue with my bookcase wobbling from side to side, would this fix that problem as well or should I brace it with real wood?
ReplyDeleteI don't think this would help with wobbling side to side, sorry!
DeleteI have a bookcase I would like to do this with but all the shelves are adjustable. Do you think this would still work with the back board being attached in 2 places? -Jen
ReplyDeleteI'm not sure if I'm understanding your comment correctly. What I think you're asking is if you can get away with not attaching the brackets to the front so that the shelves can still be moved? In that case, all you're really doing is attaching a board to the back of your bookshelf, which still does not provide any support for the middle section of each shelf. So the shelves would probably still sag after awhile. I apologize if I am just misunderstanding your question!
DeleteI think it could work--no guarantees. However, i would strongly consider making one of the middle shelves permanent by anchoring it to the new spine.
ReplyDeleteThis comment has been removed by the author.
ReplyDeleteThanks for your guide! I recently bought 4 bookshelves and used your tutorial to reinforce them. They turned out great!
ReplyDeleteThat's great! I'm so glad you found the tutorial helpful!
DeleteThanks for the tips, and to Tom as well! We are putting our set up together this weekend. We bought a set of Billy from Ikea, and saw reviews concerned about sagging. After finding your fix, maybe we should have bought crappier/cheaper bookcases to save money!
ReplyDeleteDo you think the bracket could be applied to the underside of the shelf itself, and the free end of the bracket rest against the reinforced backing? This would allow the unfixed shelves to remain adjustable. It would not be as secure, but not sure if it would prevent sagging. Of course, small screw would be needed to prevent poking through.
There is a baseboard in our rental, so I'm uncertain if we'll be able to secure these to the wall. Tom's fix with the shims might do it. Any other suggestions?
Thanks again!
Hi Garth,
DeleteI am guessing that if the bracket is attached to the underside of the shelf rather than the backboard, you will end up with extra weight on the middle of your shelves and possibly more sagging.
As for anchoring to the wall, I believe there are adjustable wall anchors that allow for a little distance from the wall. Similar to this product: https://smile.amazon.com/Quakehold-4162-15-Inch-Furniture-Antique/dp/B000FJP24U/ref=sr_1_2?ie=UTF8&qid=1466264903&sr=8-2&keywords=bookshelf+anchor
Hope you find something that works for you!
I am going to do this! My husband is a voracious reader and I couldn't find decent shelves at an affordable price... until now! I'm also going to check out your other "hacks." Thank you for sharing your ideas :)
ReplyDeleteThis saved my bookshelf. Thanks!
ReplyDeleteNow I don't have to build shelves to support my book load! I really hope this works for me. Thank you for sharing!
ReplyDeleteOk, I just bought a short walmart bookcase and when I put it together it lists to either side. I'm going to use your idea of L brackets in the corners to square up the corners.
ReplyDeleteGeniuses ideals. You simply restored my faith in buying crappy cheap Walmart furniture. Honestly, walmart could use a person just like yourself to design crap furniture , to not so crappy furniture. Thanks buddy, further more, many thanks for posting this.
ReplyDeleteThank you for this great tutorial. I just picked up a Walmart bookshelf and wanted to reinforce it before putting it to use. (Don't ask me how I know it'll need it) glad I found your post!
ReplyDeleteI was painting my old room, and moving that book shelf is a nightmare. I haven't done my reinforcements yet but at least I know. I don't have books so much as games and blurays. It's just so damn wobbly.
ReplyDeleteGreat idea. DH and I just took all our books off our 3 cheap bookcases which are full of droopy shelves. We were getting ready to go buy some lumber but I decided to check online just in case there was something about how to do it, and wham! your post came up. Thanks!
ReplyDeleteI have some crappy shelves that are cracking at the ends. All they are holding are DVDs, which tells you how crappy they are! Going to try this with a pair of brackets supporting the end of each shelf. A lot cheaper than a TV stand and way more storage. Thanks!
ReplyDelete